
Categories
DIYPublished June 13, 2025
DIY Open Kitchen Shelving: A Budget-Friendly Storage Solution for Small Kitchens

If you’ve ever struggled with storage in a small kitchen, you know how valuable every square inch can be. When traditional cabinets aren't cutting it, open shelving can be the perfect solution—and it doesn’t have to break the bank. With a bit of creativity, some basic supplies, and a vision, I transformed a plain kitchen wall into a stylish and functional storage area. Here's how I did it.
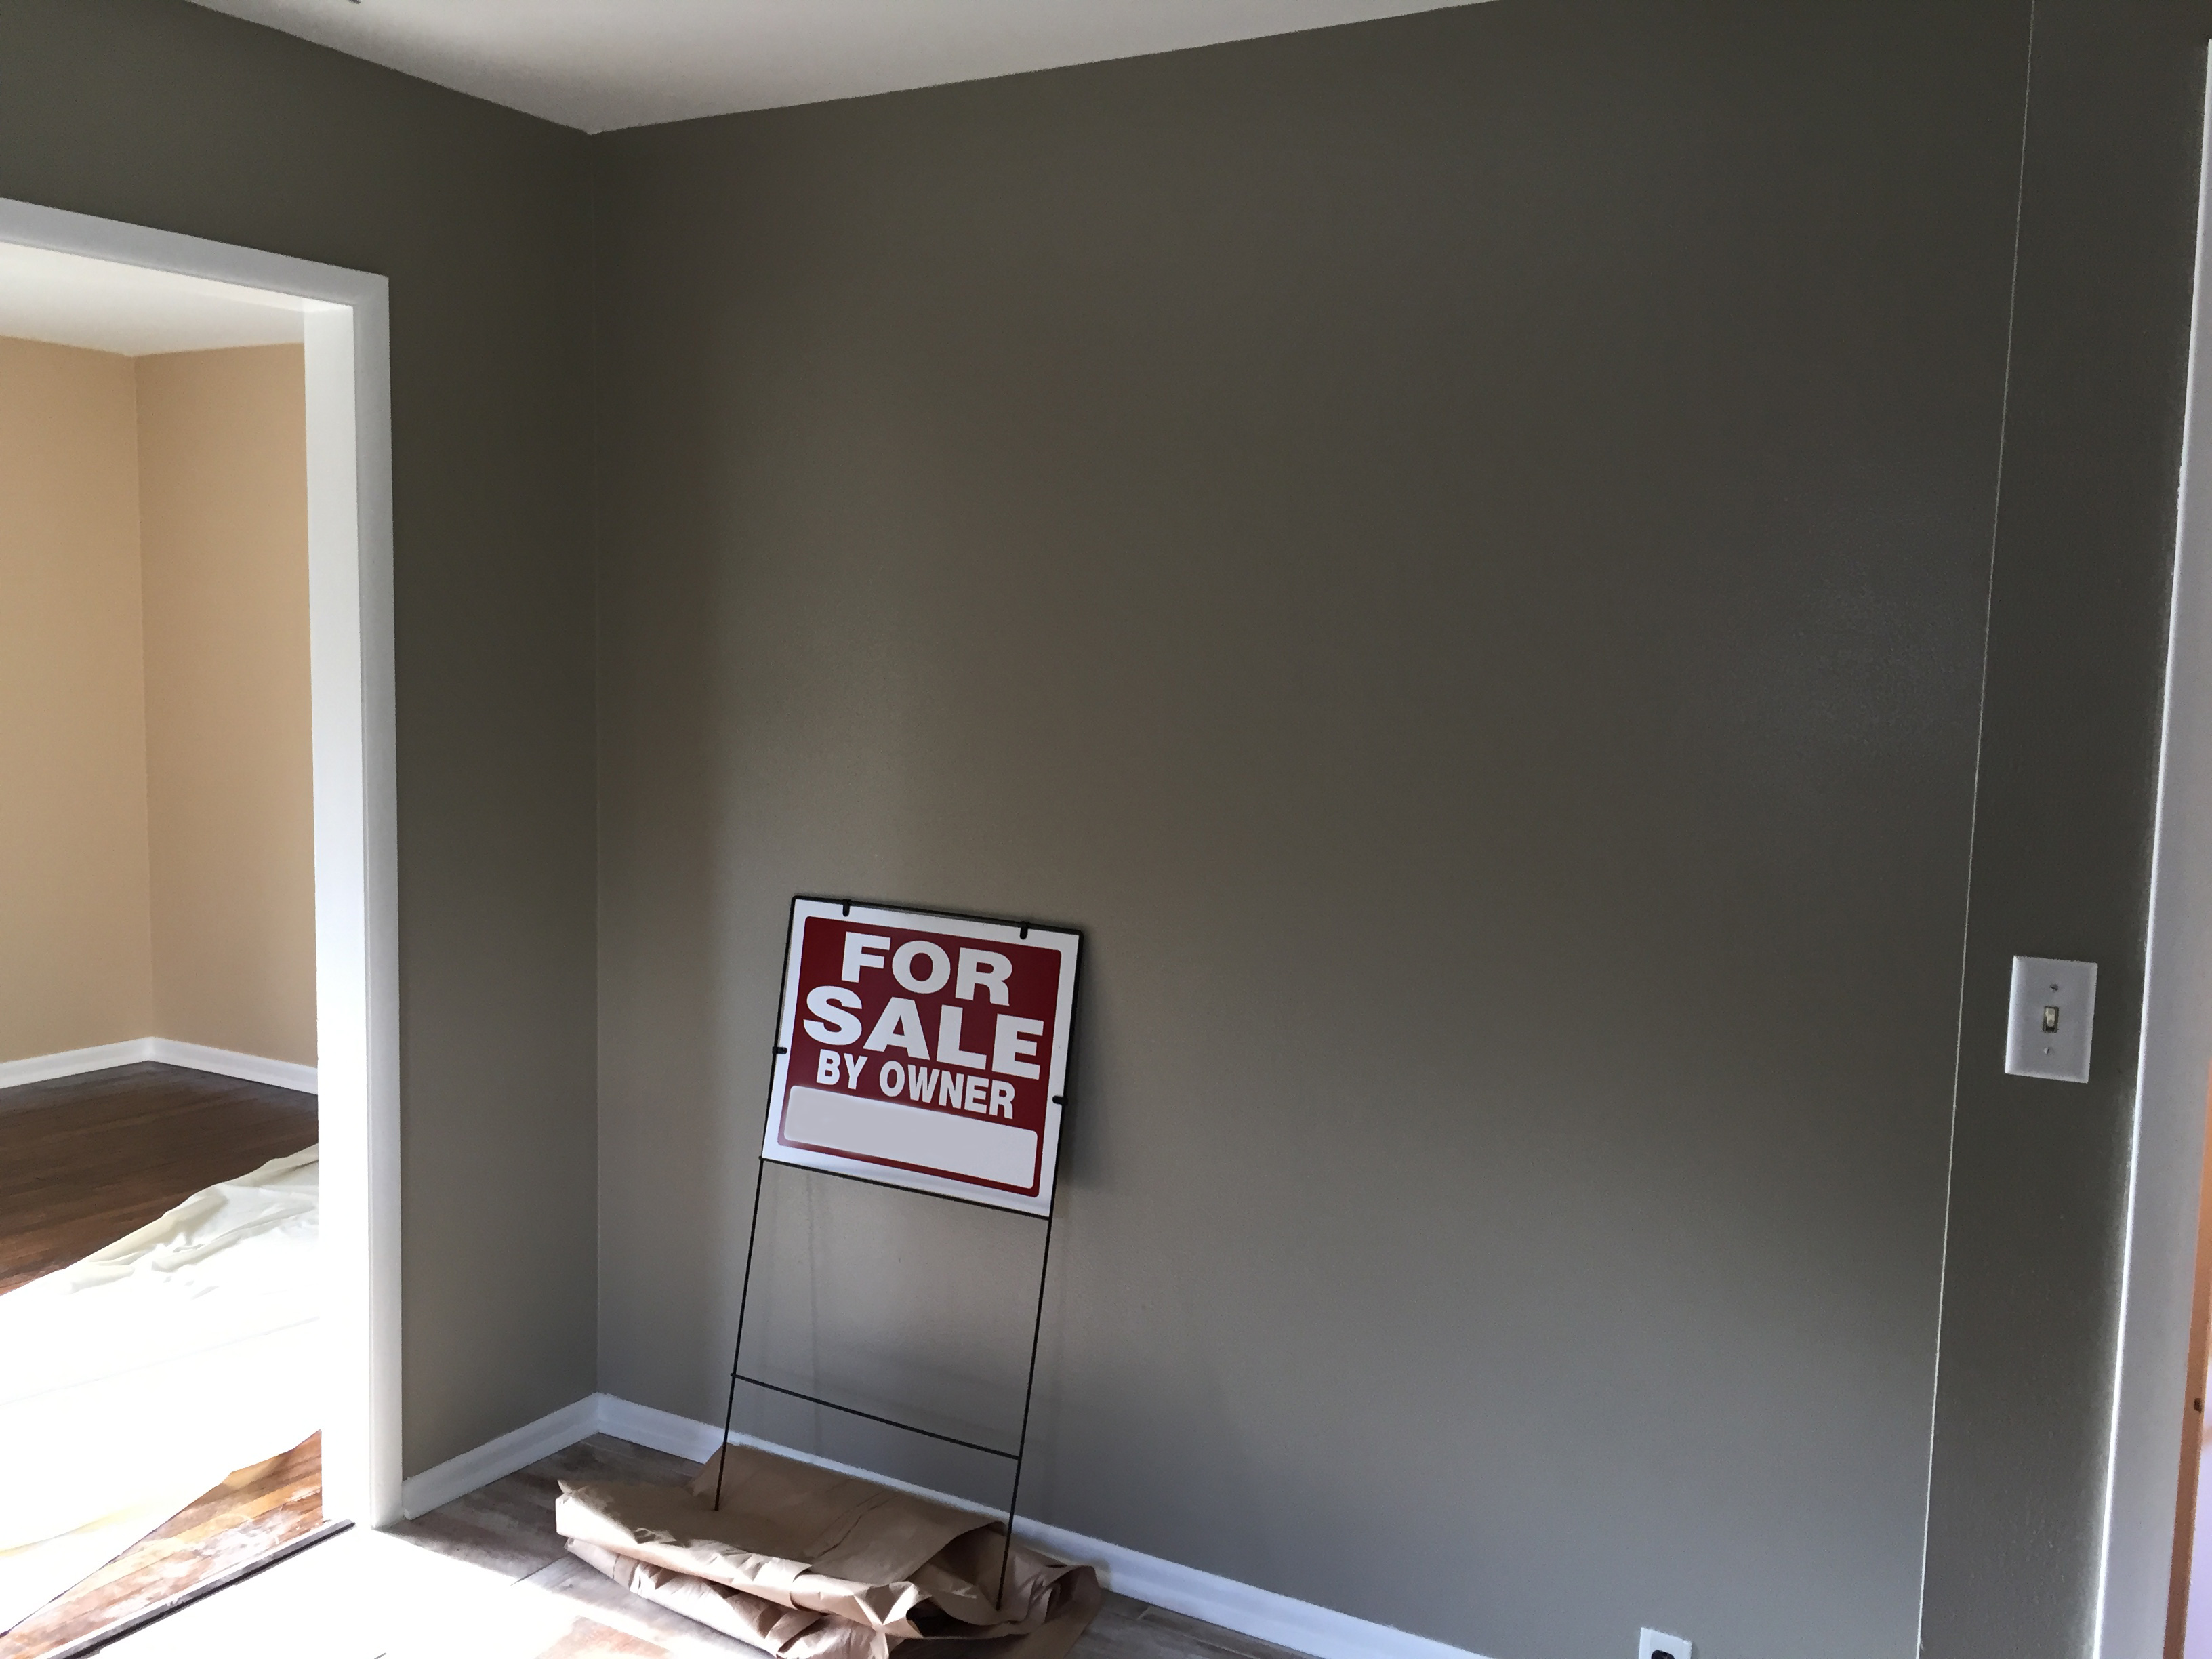
The Before
Before the project began, our kitchen had a bare wall with very little personality or function. There was no upper storage, and our counter space was already limited. It was clear we needed a solution that added both visual interest and practical storage—without a major renovation.
The Plan: Keep It Cheap, Functional & Stylish
Rather than purchasing expensive pre-made shelves or custom cabinetry, I went the DIY route. I used affordable boards from the local hardware store and stained them myself to get that warm, rustic look. The stain brought out the natural wood grain beautifully and gave the shelves a more finished appearance.
To support the shelves, I chose simple black metal brackets. They were inexpensive and easy to install but sturdy enough to hold jars, books, and even heavy containers. I love that the design of the brackets gives the illusion of floating shelves, offering a clean and minimalistic feel.
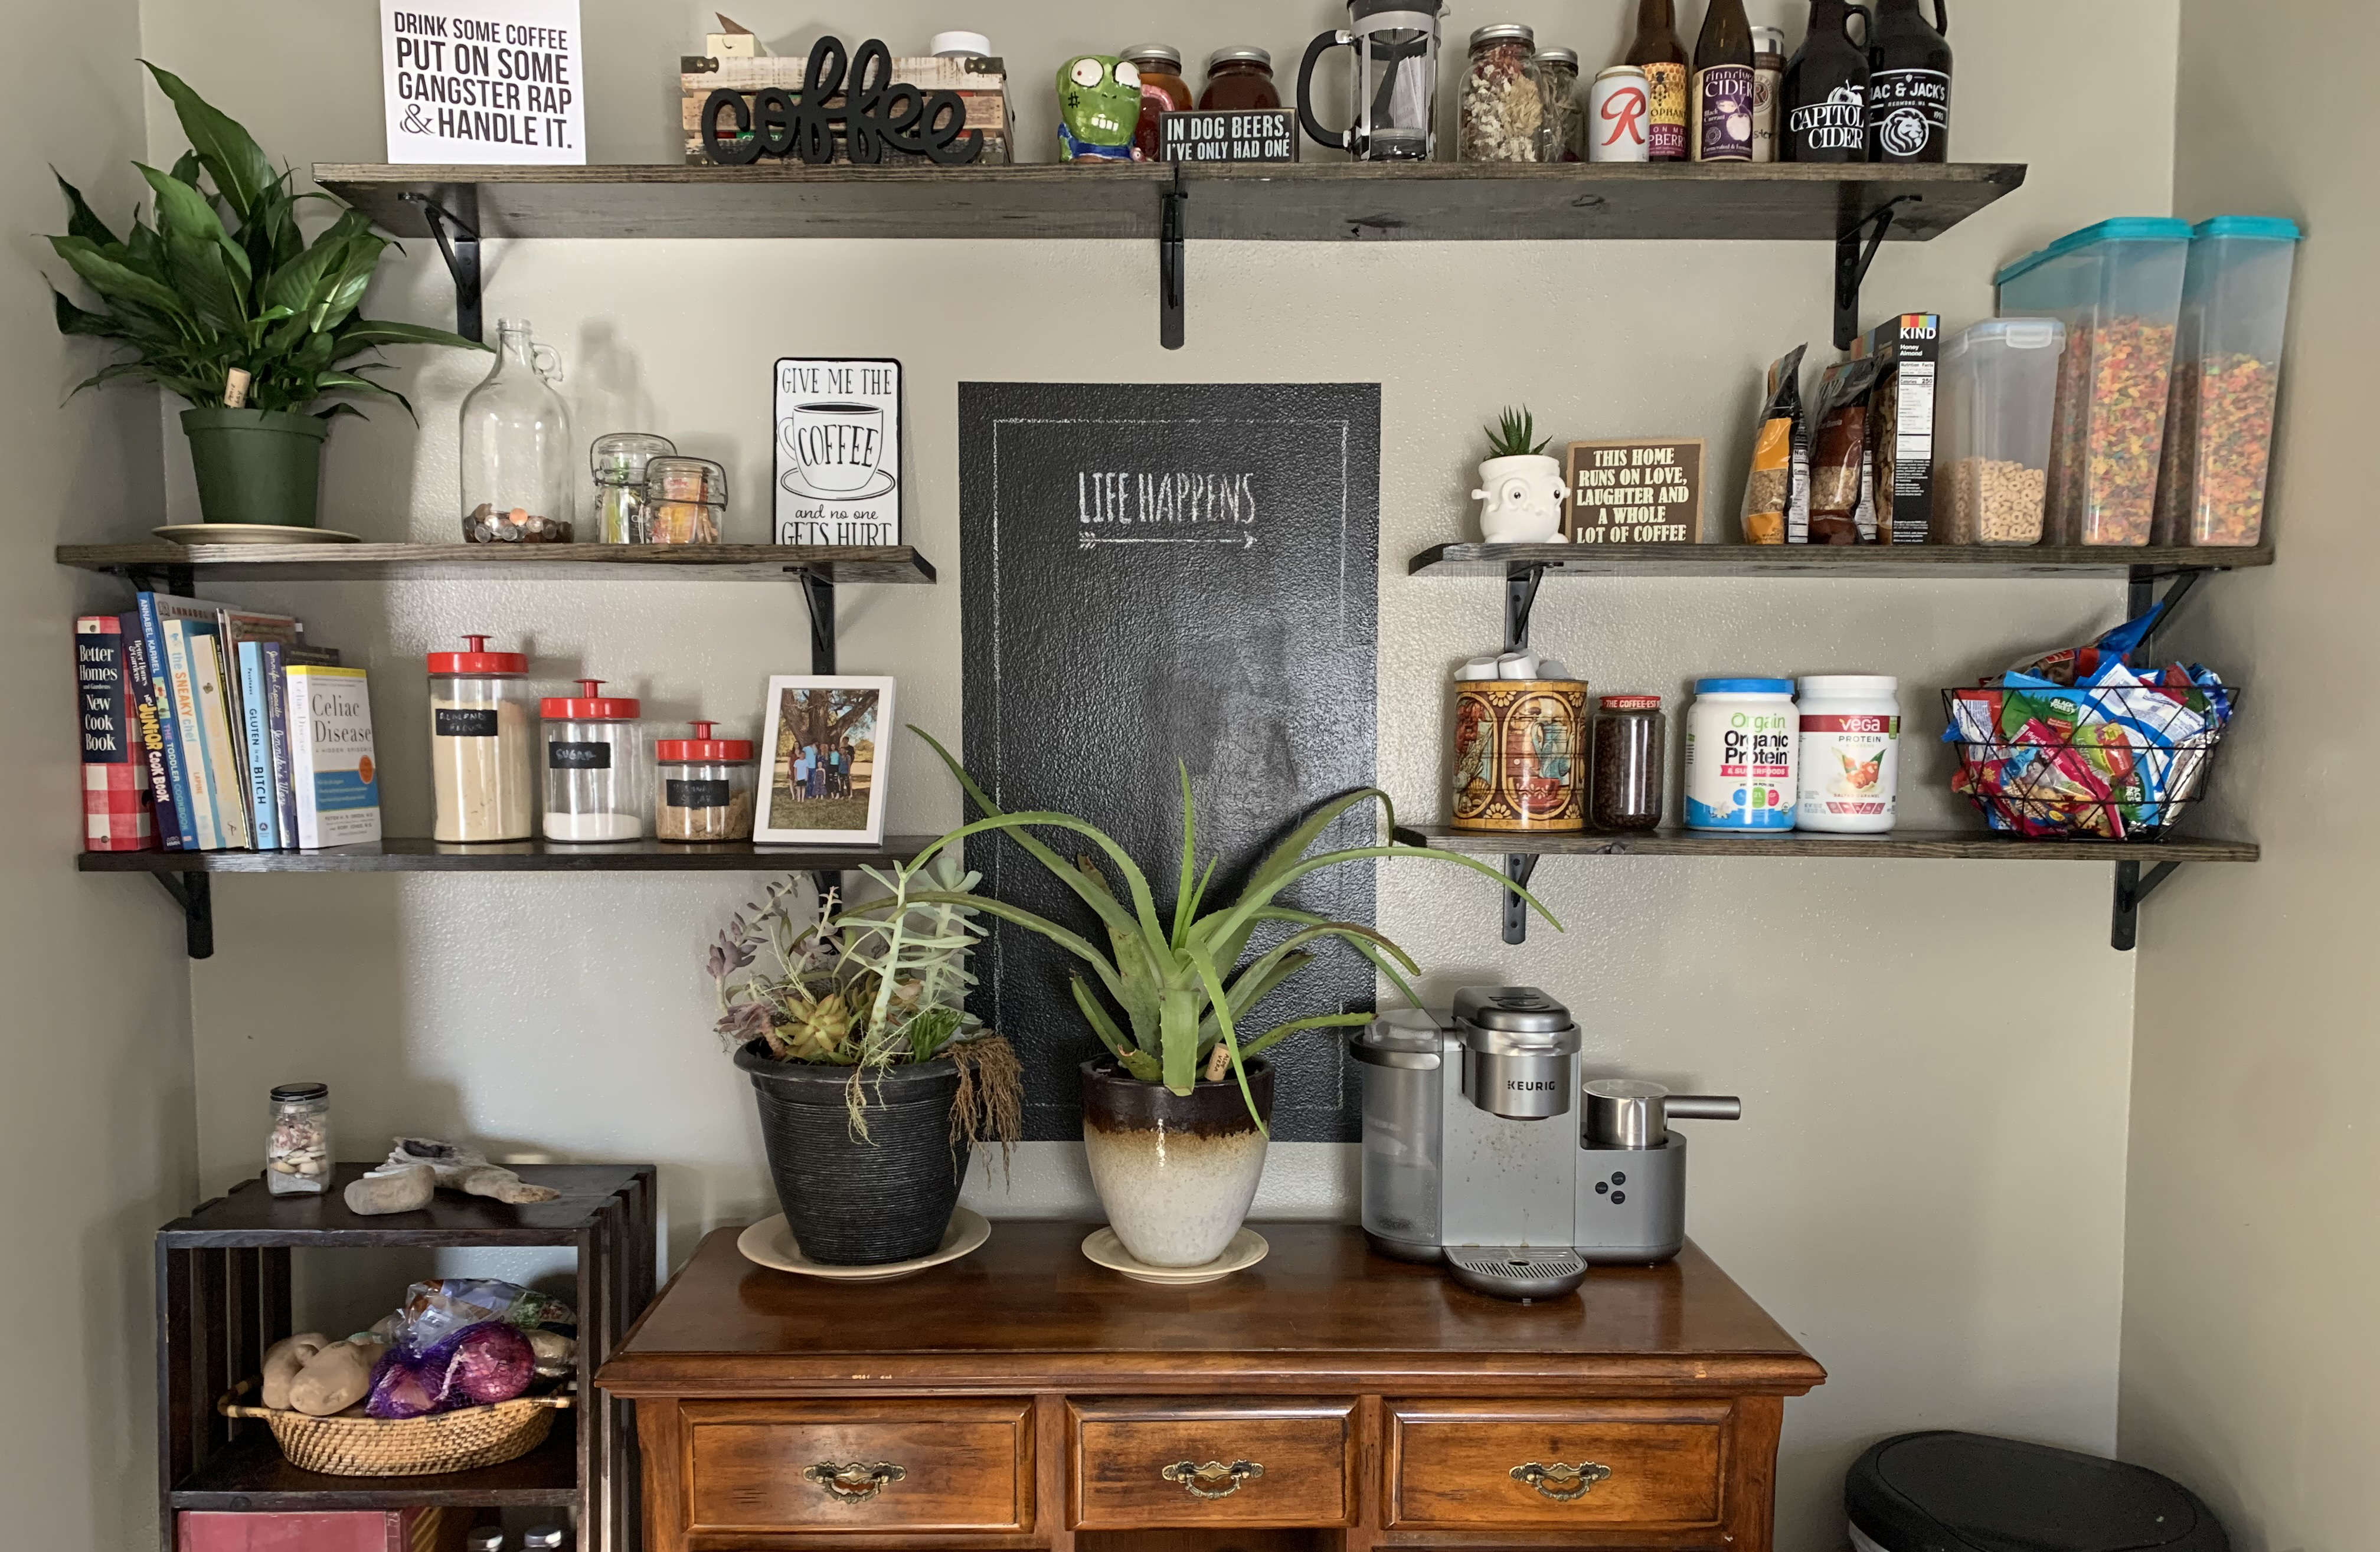
The After: Form Meets Function
The transformation speaks for itself. The once-empty wall is now a beautiful open pantry and coffee station, complete with shelves that hold everything from cereal and spices to plants and cookbooks.

The setup has evolved over time, becoming not just a storage space, but a decorative focal point. I added framed prints, a chalkboard panel, and meaningful touches like mugs and signs to reflect our personality. As our storage needs changed, the shelves adapted—an easy update when everything is accessible and flexible.
Why It Works
Tips for Your Own DIY Shelving Project
The Before
Before the project began, our kitchen had a bare wall with very little personality or function. There was no upper storage, and our counter space was already limited. It was clear we needed a solution that added both visual interest and practical storage—without a major renovation.
The Plan: Keep It Cheap, Functional & Stylish
Rather than purchasing expensive pre-made shelves or custom cabinetry, I went the DIY route. I used affordable boards from the local hardware store and stained them myself to get that warm, rustic look. The stain brought out the natural wood grain beautifully and gave the shelves a more finished appearance.
To support the shelves, I chose simple black metal brackets. They were inexpensive and easy to install but sturdy enough to hold jars, books, and even heavy containers. I love that the design of the brackets gives the illusion of floating shelves, offering a clean and minimalistic feel.
The After: Form Meets Function
The transformation speaks for itself. The once-empty wall is now a beautiful open pantry and coffee station, complete with shelves that hold everything from cereal and spices to plants and cookbooks.
The setup has evolved over time, becoming not just a storage space, but a decorative focal point. I added framed prints, a chalkboard panel, and meaningful touches like mugs and signs to reflect our personality. As our storage needs changed, the shelves adapted—an easy update when everything is accessible and flexible.
Why It Works
- Budget-Friendly: The entire project cost significantly less than new cabinets.
- Boards, stain, and brackets were all bought at a fraction of the cost.
- Customizable: I chose the length, depth, and finish of the shelves to fit our space perfectly.
- Extra Storage: We now have more room for pantry items, coffee supplies, and even a wine rack and trash bin tucked underneath.
- Aesthetic Appeal: The combination of stained wood and black brackets gives a modern farmhouse vibe that fits right in with the rest of our kitchen.
Tips for Your Own DIY Shelving Project
- Use a level when installing brackets to keep shelves even.
- Stain before you install—it’s way less messy!
- Measure everything twice to ensure you have room between shelves for taller items.
- Add personal touches like framed photos, plants, or fun signage to make it your own.
|


or another way